Earlier today I twittered that I wanted to build a simple AIR application. The idea would be to use the web cam on my Macbook Pro and snap a picture every minute or so. I thought this would be relatively easily in AIR and I wasn't surprised at all. Let me be honest - I did not do heavy research into this. I found two really good web sites and built my application from what I saw there. There is - most definitely - probably much cleaner ways of doing this. I built this for fun - nothing more. That being said, let's take a look.
The first web site I want to mention is this blog entry: Take a webcam snapshot in Flex 2.0 by Koen De Weggheleire. In his entry he creates a panel that is linked to your web cam. I didn't touch his code at all - it worked perfectly.
Once I had his panel as a component, I then created my application:
<?xml version="1.0" encoding="utf-8"?>
<mx:WindowedApplication xmlns:mx="http://www.adobe.com/2006/mxml" layout="vertical" initialize="init()" xmlns:components="components.*" backgroundColor="white" >
<mx:Script>
<![CDATA[
import mx.graphics.codec.JPEGEncoder;
import flash.filesystem.*;
import flash.utils.Timer
import flash.events.TimerEvent
//number of minutes for http duration
private const duration:int = 1
private var myTimer:Timer
private var jpg:JPEGEncoder;
public function init():void {
jpg = new JPEGEncoder(100);
myTimer = new Timer(duration101000,0);
myTimer.addEventListener("timer", takeShot);
}
public function takeShot(evt:TimerEvent):void {
var snapshot:BitmapData = new BitmapData(liveWebCam.video.width, liveWebCam.video.height, true);
snapshot.draw(liveWebCam.video);
var ba:ByteArray = jpg.encode(snapshot);
var newImage:File = new File();
var now:Date = new Date();
var newFileName:String = now.fullYear + "" + now.month + "" + now.date + "" + now.hours + "" + now.minutes + "_" + now.seconds;
newImage = File.desktopDirectory.resolvePath("Images/" + newFileName + ".jpg");
var fileStream:FileStream = new FileStream();
fileStream.open(newImage, FileMode.UPDATE);
fileStream.writeBytes(ba);
}
public function startTimer():void {
myTimer.start()
txtStatus.text = "Running"
}
public function stopTimer():void {
myTimer.stop()
txtStatus.text = "Stopped"
}
]]>
</mx:Script>
<mx:ControlBar>
<mx:Button label="Start" id="startBtn" click="startTimer()" />
<mx:Button label="Stop" id="stopBtn" click="stopTimer()" />
<mx:Label text="Status: " />
<mx:Text id="txtStatus" text="Stopped" />
</mx:ControlBar>
<mx:HBox>
<components:WebcamPanel id="liveWebCam" width="360" height="320" layout="absolute"
title="Live View"
borderColor="#000000" borderStyle="solid" cornerRadius="0"
barColor="#FFFFFF" borderThickness="10" dropShadowColor="#FFFFFF" dropShadowEnabled="false"
footerColors="#FFFFFF" headerColors="#FFFFFF" highlightAlphas="0" shadowDirection="center"
textAlign="right" textDecoration="none" borderAlpha="0" fontWeight="bold" shadowDistance="10" alpha="1.0" >
</components:WebcamPanel>
</mx:HBox>
</mx:WindowedApplication>
There is a lot here - so let me begin with the layout portion towards the bottom. The application has an incredibly simple UI. A set of buttons on top to start and stop the snapshot process and finally Koen's WebcanPanel so I can see what the camera sees. Here is a screen shot of it running:

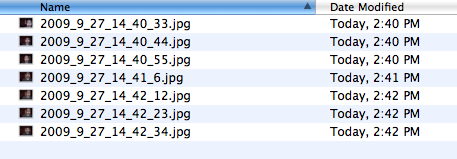
Clicking the Start button is where the magic happens. Scroll back up to the ActionScript code. I've got a Timer object that handles the "every N seconds" process. I've set it to 10 seconds which is a bit aggressive, but my hard drive is mostly empty so I figured what the heck. The timer process runs takeShot. Half of this code comes from the blog entry linked to above. It creates a Bitmap object from the camera object. To actually save it, I used this excellent entry from Rich Tretola: Create Images with AIR and JPEGEncoder. In it, Rich describes saving bitmap graphics as JPG files to the file system. I modified his code just a tiny bit to make the file name dynamic based on time. Notice it makes use of File.desktopDirectory. This means that the AIR application will have an easy way to find the user's desktop, no matter what operating system. Let it run for a while and your Images folder (under the Desktop) will begin to fill.

And that's it. You can download a zip of the code and the compiled AIR application below. As I said, this can probably be done much cooler. (Earlier today some sent me a link to an AIR application that only took pictures when movement was detected. That's definitely more intelligent. Unfortunately Firefox's history tool is failing me.) Now the question is - where do I run this? I'm thinking of just leaving my laptop facing out the front window of my house. It would give me a view of the front yard and the street. We've got a pretty quiet neighborhood though so I doubt I'd see much. I could do it Halloween night though and see if anyone comes to TP the house.
One quick tip: When I first tested, the AIR application would ask permission to use my webcam, but it never actually worked. Thanks go to Todd Sharp for cuing me in on the fact that somehow my preferences for Flash and the web cam had gotten borked. Switching it to USB Video Class Video fixed things (at least for me on a Macbook Pro).