A few days ago a reader asked me an interesting question. He wanted to create a list of dates in jQuery Mobile and group them by date. Turns out, this is fairly easy using the Autodividers feature of the ListView widget.
jQuery Mobile has supported dividers in lists for a while now, but recent editions added support for creating them automatically. Out of the box, jQuery Mobile will create dividers based on the first letter of the list item. Consider this example.
<ul data-role="listview" data-inset="true" data-autodividers="true">
	<li>Benedict</li>
	<li>Bleys</li>
	<li>Brand</li>
	<li>Caine</li>
	<li>Corwin</li>
	<li>Eric</li>
	<li>Gerard</li>
	<li>Julian</li>
	<li>Random</li>
</ul>
By adding autodividers="true" to the list, you get dividers based on the first letter in each name above.

So the obvious next question is - how do you create dividers based on some other form of grouping - like dates? Luckily jQuery Mobile's listview widget gives you an easy way to handle this.
You simply take the listview widget and define a function that returns the "selector" for an item. In abstract, it would look like this:
$("some selector").listview({
	autodividers:true,
	autodividersSelector: function ( li ) {
		// "li" is the list item, you can get the text via li.text()
		// and then you return whatever you want - in text that is
		return li.text().substring(0,1).toUpperCase();
	}
}).listview("refresh");
The method above should work the same as the default behavior. Get the first letter and upper case it. (I typed this without actually running it so if there is a typo above blame my laziness.)
In order to support our date grouping, we can use this method and JavaScript date methods. Let's look at a full example. First, the HTML. Note that I've made an empty list widget that will store my data.
<!DOCTYPE html>
<html>

    <head>
        <meta charset="utf-8">
        <meta name="viewport" content="width=device-width, initial-scale=1">
        <title>Divide Demo</title>
        <link rel="stylesheet" href="http://code.jquery.com/mobile/1.3.2/jquery.mobile-1.3.2.min.css" />
        <script src="http://code.jquery.com/jquery-1.9.1.min.js"></script>
        <script src="http://code.jquery.com/mobile/1.3.2/jquery.mobile-1.3.2.min.js"></script>
    </head>

    <body>

        <div data-role="page" id="mainPage" >

            <div data-role="header">
                <h1>Our Events</h1>
            </div>

            <div data-role="content">
				<ul data-role="listview" data-inset="true" id="dates" data-autodividers="true">
				</ul>
            </div>

            <div data-role="footer">
                <h4>Footer content</h4>
            </div>

        </div>

		<script src="datestuff.js"></script>

	</body>
</html>
Now let's look at the JavaScript.
/* global $,document,console,quizMaster */
$(document).ready(function() {

	var dates = [
		"12/16/2013 12:00:00",
		"12/16/2013 14:00:00",
		"12/17/2013 12:00:00",
		"12/18/2013 12:00:00",
		"12/19/2013 12:00:00",
		"12/19/2013 16:00:00"
	];

	var dateList = $("#dates");
	for(var i=0, len=dates.length; i<len; i++) {
		dateList.append("<li>"+dates[i]+"</li>");
	}

	dateList.listview({
		autodividers:true,
		autodividersSelector: function ( li ) {
			var d = new Date(li.text());
			return (d.getMonth()+1)+ "/" + d.getDate() + "/" + d.getFullYear();
		}
	}).listview("refresh");

});
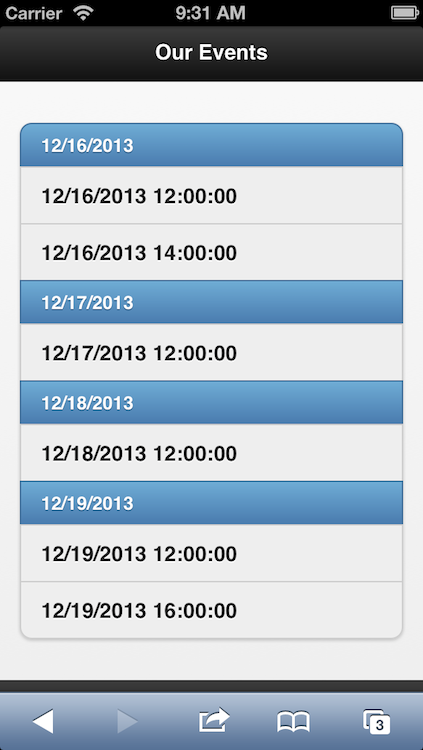
At the top I've got a set of hard coded dates. These would typically be loaded via Ajax. I loop over them and insert them into the list. Once I've got that I can then initialize my listview and define a custom selector. As I mentioned above, I can use JavaScript date methods to return a string based on just the date portion of the date values I had above. (In other words, ignore the time.) I can also do some formatting on the date to make it look nice. Here is the final result.

You can run a full demo of this below.