Ionic Example: Slides
A little over a year ago I wrote a post ("Ionic Example: ion-slide-box") that demonstrated how to use the ion-slide-box component with Ionic 1. A few days ago a reader asked if I could update that post to work with Ionic 2. I've done that and am now going to share some of the code from the updated version.
In case you don't feel like reading the previous entry, the demo was rather simple. It made use of the Bing Image Search API to fetch pictures based on your input. For context, here's an example of how it looked for Ionic 1 and iOS:

I'm beginning to think it is physically impossible for me to do a demo that doesn't involve cats. Anyway, let's talk about the Ionic 2 version. First, the view:
<ion-header>
  <ion-navbar>
    <ion-title>
      Image Search
    </ion-title>
  </ion-navbar>
</ion-header>

<ion-content padding>

  <ion-item>
    <ion-input type="search" placeholder="Search" [(ngModel)]="search"></ion-input>
  </ion-item>

  <button ion-button full (click)="doSearch()">Search</button>

  <ion-slides [options]="mySlideOptions">
    <ion-slide *ngFor="let slide of slides">
      <img [src]="slide.MediaUrl">
    </ion-slide>
  </ion-slides>

</ion-content>
In form, it's similar to the V1 version of app, but while V1 still had a mix of HTML and Ionic components, this is nearly 100% Ionic tag-based. The only non-Ionic component there is the button tag and even it uses an argument to flag it as being Ionic-controlled anyway. If you're still new to Angular 2 (like me!), you should pay special attention to the new syntax used for event handling: (click)="doSearch()" and two way binding: [(ngModel)]="search". Another tweak is to iteration. While V1 had ng-repeat, I'm using *ngFor in V2. All in all, the view here is simpler than my previous version. (But to be clear, the previous version did everything in one HTML file as it was so simple. I could have seperated out the view into its own file.) Now let's take a look at the code. First, the code for the view:
import { Component } from '@angular/core';
import { NavController } from 'ionic-angular';
import { ImageSearch } from '../../providers/image-search';

@Component({
  selector: 'page-home',
  templateUrl: 'home.html',
  providers:[ImageSearch]
})
export class HomePage {

  search:string;
  slides:any[];
  mySlideOptions = {
    pager:true
  };

  constructor(public navCtrl: NavController, public searchProvider:ImageSearch) {
  }

  doSearch() {
    console.log('searching for '+this.search);
    this.searchProvider.search(this.search).subscribe(data => {
      console.log(data);
      this.slides = data;
    });
  }

}
There isn't anything too scary here. I've got one method, doSearch, that simply fires off a call to my provider for Bing searches. The only real interesting part is mySlideOptions. If you want to tweak how the slide works, you can't just pass arguments via the component tag. That kinda sucks in my opinion, but I'm guessing there is a good reason for that. I had tried adding pager="true" to my ion-slides tag, but that didn't work. I had to create a variable and then bind to it from the view. Again, that bugs me. I can get over it though.
The provider is now all wrapped up in fancy Oberservables and crap which frankly still confuse the hell out of me. But I got it working. The hardest thing was figuring out how to do headers.
import { Injectable } from '@angular/core';
import { Http, Headers} from '@angular/http';
import 'rxjs/add/operator/map';
import { Observable } from 'rxjs/Observable';

/*
  Generated class for the ImageSearch provider.

  See https://angular.io/docs/ts/latest/guide/dependency-injection.html
  for more info on providers and Angular 2 DI.
*/
@Injectable()
export class ImageSearch {

  appid = "fgQ7ve/sV/eB3NN/+fDK9ohhRWj1z1us4eIbidcsTBM";
  rooturl = "https://api.datamarket.azure.com/Bing/Search/v1/Image?$format=json&Query='";

  constructor(public http: Http) {
    this.http = http;
  }

  search(term:string) {

      let url = this.rooturl + encodeURIComponent(term) + "'&$top=10";

      let headers = new Headers();
      headers.append('Authorization', 'Basic '+ btoa(this.appid + ':' + this.appid));
      return this.http.get(url,{headers:headers})
        .map(res => res.json())
        .map(data => data.d.results);

  }

}
And yep, that's my Bing key. I'll probably regret sharing it. So how does it look? Here's an iOS example:

Right away you'll notice the pager isn't actually there. I'm not sure why that is failing to show up because it does show up when running ionic serve. I could definitely try to size that image a bit nicer in the view, but for a quick demo, I got over it.
A few minutes later...
So I was wrapping up this blog post when I started chatting about it over on the Ionic Slack channel. Mike, and others, helped me discover a few things.
First, you know how I complained about having to create a variable in my JS code just to handle a simple option? Turns out you can do it all in the view - thanks Mike:
<ion-slides [options]="{pager:true}">I added that and then removed the code from home.ts, making it even simpler. But I still had the bug with the pager not showing up. It clearly worked in ionic serve, see?
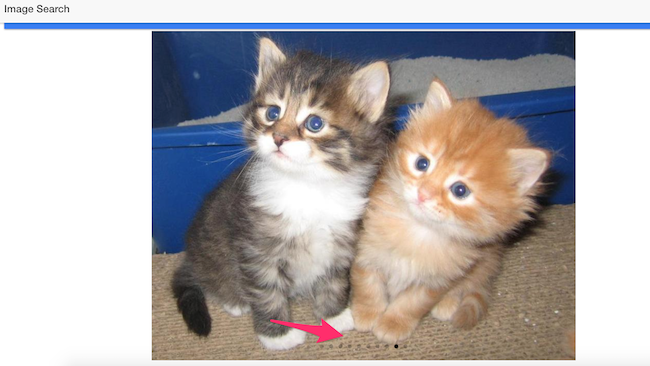
So wtf, right? Then I remembered - Chrome DevTools has a Responsive Mode. What happens when we turn that on?
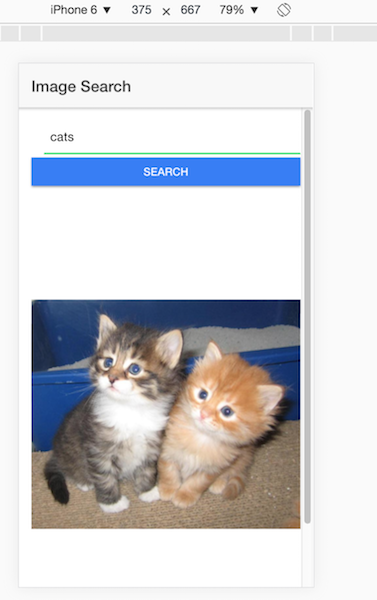
Boom. Right away I see the same bug... and I notice the scrollbar. I scroll down and see...
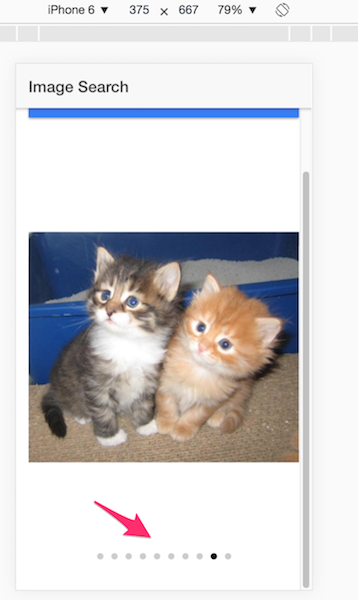
Yep, my slides portion is just too big. On my iOS simulator I scrolled down and confirmed. Sigh. So (and again, with help from smart folks on the Slack channel!), I ended up styling the ion-slides components:
<ion-slides [options]="{pager:true}" style="max-height:400px">I use a set max of 400px, which isn't terribly cross platform compatible, but it helped:

Perfect! Except this is what you see on initial load:
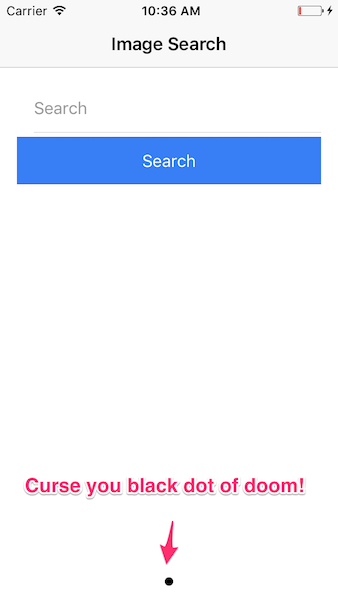
Ugh. So I tried going back to having options defined in JavaScript and simply changing it when data was loaded, but that didn't work. I then tried getting a pointer to the slider object and updating it that way. It also didn't work.
Ugh again. So I went back to a simple inline option declaration but also hid the entire slider:
<ion-slides [options]="{pager:true}" style="max-height:400px" *ngIf="haveData">
I then modified my code to default haveData:
import { Component, ViewChild } from '@angular/core';
import { NavController, Slides } from 'ionic-angular';
import { ImageSearch } from '../../providers/image-search';

@Component({
  selector: 'page-home',
  templateUrl: 'home.html',
  providers:[ImageSearch]
})
export class HomePage {

  search:string;
  slides:any[];
  haveData:boolean = false;

  constructor(public navCtrl: NavController, public searchProvider:ImageSearch) {
  }

  doSearch() {
    console.log('searching for '+this.search);
    this.searchProvider.search(this.search).subscribe(data => {
      console.log(data);
      if(data.length >= 1) {
        this.haveData=true;
        this.slides = data;
      }
    });
  }

}
And now it works perfectly! To be fair, this still needs a nice "loading" widget UI when searching, but as I mainly wanted to focus on the slides, I figure I should try to keep this simple. The full source code for this demo may be found here: https://github.com/cfjedimaster/Cordova-Examples/tree/master/ionicslidebox2
Let me know if you have any questions or comments below.