An Introduction to Creating Alexa Skills with OpenWhisk
As I mentioned in my post earlier this week (A Tip for Testing Alexa Skills), I'm a huge new fan of the Amazon Echo device and I've begun looking at how to build my own integrations with it. This week I've done some investigations into how to use Alexa with OpenWhisk and I have to say I'm impressed by how easy it is. To be clear, I've only played with the most basic of skills, but it is easy and quite a bit of fun too!
What follows is not meant to be a complete guide to working with Alexa, Amazon has good docs for that and I'll share a bunch of links at the end. Nor am I the first do to OpenWhisk with Alexa, I'll share links of other examples as well. Instead, I'll demonstrate the process I used, talk about the things to look out for, and demonstrate the result. As always, questions and suggestions are appreciated!
First off, make sure you have an Amazon Developer account. You can sign up here: https://developer.amazon.com/. I did this a long time ago when I put some Android apps in the Amazon marketplace. Secondly, you'll want a free Bluemix account as well. You can sign up for that here: https://console.ng.bluemix.net/registration/. As a reminder, using Bluemix is not required for working with OpenWhisk, it just makes it a heck of a lot easier.
Version One
Let's start on the Alexa site. Assuming you've logged into the dev portal, click on the Alexa tab.
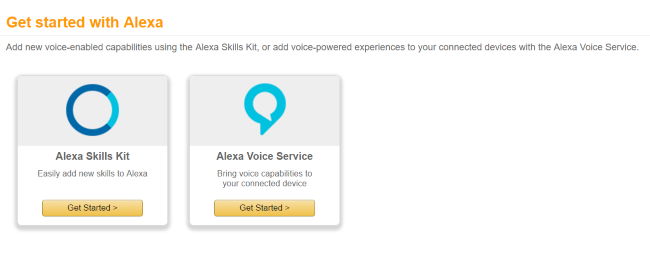
You will want to click on "Alexa Skills Kit." Remember that the interactions we create with Alexa are called skills. The next page will list your current skills. You will want to click on "Add a New Skill" (unless, obviously, you are editing an existing one).

Next comes up a rather large, complex form that can be a bit scary. (Ok, maybe that's just me.) Just note that you don't have to answer everything right away. One thing you'll see, an Amazon deserves a lot of credit for this, is that they made testing pretty darn easy. Again, the documentation goes into big detail about stuff works and I'll provide those links at the end.
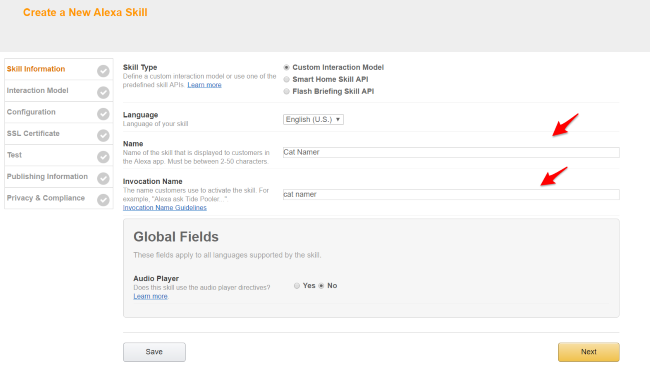
This first page just needs the name and the invocation name. As the form says, the difference is that invocation name is how you actually address it when speaking to an Echo device. I named my "Cat Namer" for reasons that will become clear later. (Spoiler - it involves cats.)
Now things get serious...
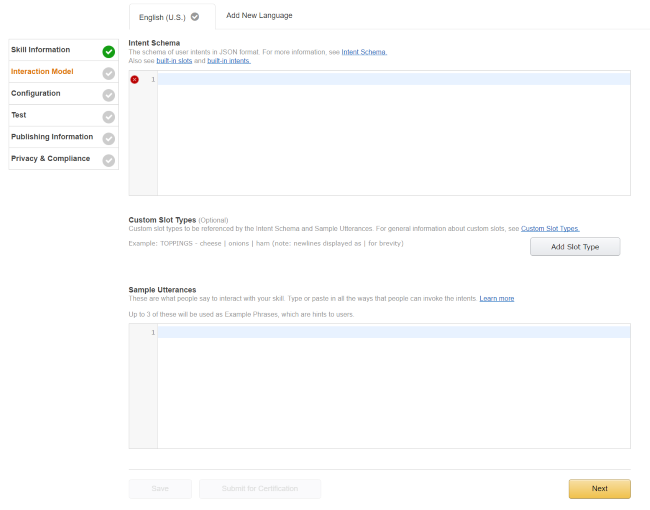
On this page, you need to define two things. Intents are how you describe, at a high level, the API to your skill. So imagine your API has one function, return a random number. In that case, you have one intent. If your skills has two features, let's say a random number generator and a random cat namer, you would have two intents.
The "Sample Utterances" field is where you describe how people can use your intents. Going back to the example of a random number generator, it may be something like this:
Give me a random number I need a random number I need something random
You prefix each utterance with the intent name so Alexa knows how to map them. Utterances can also contain variables, and this is where things get really complex. Amazon calls variables "slots", and it supports a basic system of "slot types". A good example of this is the date slot type. Amazon lets you define an utterance that includes a date. So example:
Give me a random number for tomorrow Give me a random number for next year
Which would be really written as:
Give me a random number for {date}
Where the {date} slot is defined to be a date slot type. Amazon has a bunch of these (Slot Type Reference) covering things like dates, times, numbers, colors, and my favorite - desserts. You can also define your own which is useful for more free form checking.
As I said, this part is a bit complex. I began with this intent schema:
{
  "intents": [
    {
      "intent": "randomName"
    }
  ]
}
In this case I've defined one intent with no slots. Basically, no real user arguments. (My next version will add that.)
I then wrote these utterances:
randomName give my cat a random name randomName name my cat randomName give my cat a name
As I mentioned above, you prefix each utterance with the name of the intent.
Ok, so at this point, let's switch gears a bit. The next step is going to ask for the end point for the skill, so we should probably actually build it. Again, I'm assuming you have OpenWhisk and Bluemix ready to go, if not, you can read my other posts on the topic to get up to speed. I began with an action that actually did nothing but return a static result.
function main(args) {
  var response = {
    "version": "1.0",
    "response" :{
      "shouldEndSession": true,
      "outputSpeech": {
        "type": "PlainText",
        "text": "Your random cat is X"
        }
      }
  }

  return response;

}

exports.main = main;
How did I know how to return this structure? By copying code from my coworker, Lorna. :) (I'll link to her demo at the end.) Obviously the Amazon docs go into detail about what can/should be returned here. Make note of the shouldEndSession. While I'm not using it, you can actually have a conversation with a skill that goes over multiple interactions. That's freaking cool.
So I saved this as an action and then exposed it as a REST API:

Now that I had an action available, I went back to my Amazon skill editor:
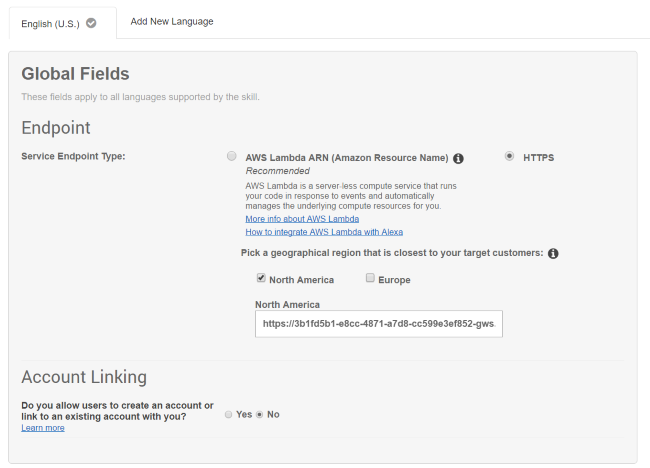
I selected HTTPS, North America, and then entered the URL that the OpenWhisk CLI gave me.
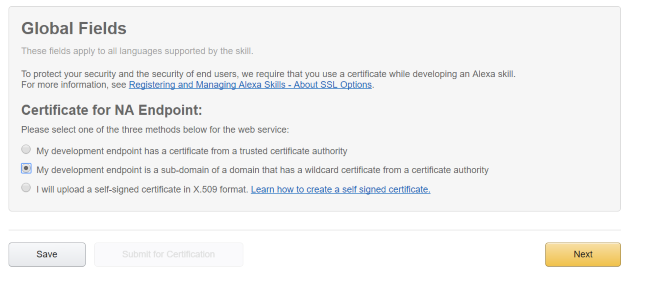
The next step is crucial, and again, I have Carlos Santana to thank for helping me here. In the SSL Certificate part, be sure to select the middle option.
Ok, so finally, you are dropped on the test page:
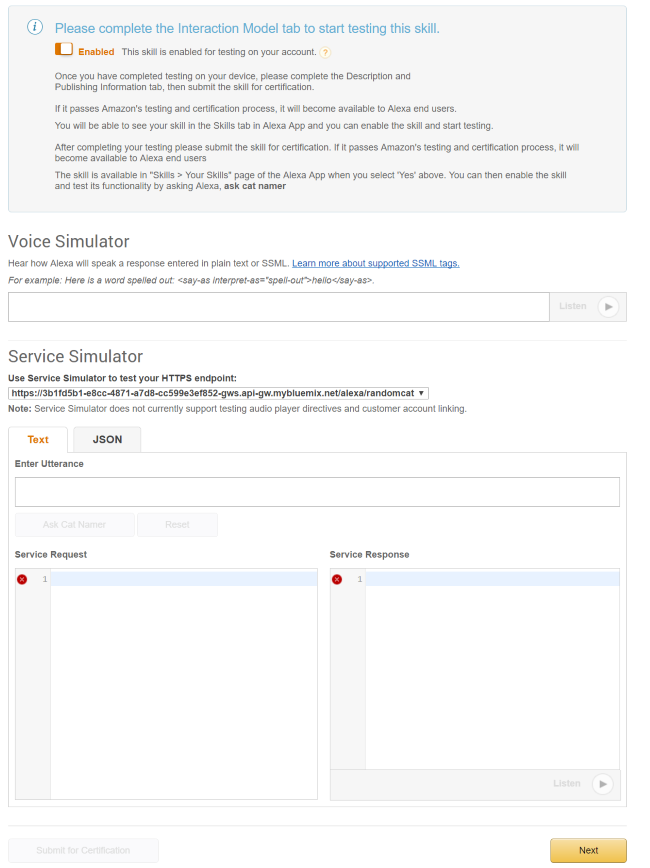
At this point, you can enter test input. As I mentioned in my post yesterday, the error handling isn't very good here, so you want to keep the Alexa app open and running near by for real time results.
Here is my first test:
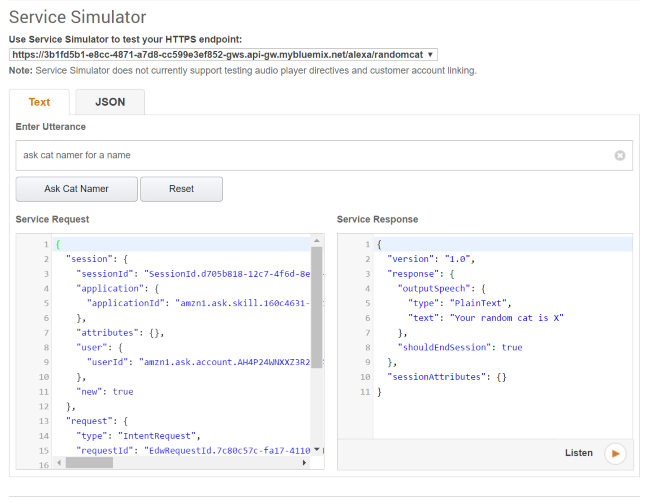
Notice that you do not have to type "ask cat namer", that part is automatic.
And get this - that's it! The rest is just updating your code and interaction model.
But wait! It gets even better. The Echo devices you have tied to your account? You can use them! I honestly was surprised by that. I would have imagined some arcane secret process to "dev enable" my device, ala Android's stupid multi button click thing, but nope, it just plain freaking works. Which is kinda cool. I can totally see myself building skills just for my own devices to have fun around the house. I just can't get over how pleased I am with how easy Amazon made all this. (Of course, there's a caveat towards the end.) So with that done - let's build the "real" cat name:
function getRandomInt(min, max) {
	return Math.floor(Math.random() * (max - min + 1)) + min;
}

function randomName() {
	var initialParts = ["Fluffy","Scruffy","King","Queen","Emperor","Lord","Hairy","Smelly","Most Exalted Knight","Crazy","Silly","Dumb","Brave","Sir","Fatty"];
	var lastParts = ["Sam","Smoe","Elvira","Jacob","Lynn","Fufflepants the III","Squarehead","Redshirt","Titan","Kitten Zombie","Dumpster Fire","Butterfly Wings","Unicorn Rider"];
	return initialParts[getRandomInt(0, initialParts.length-1)] + ' ' + lastParts[getRandomInt(0, lastParts.length-1)]
};

function main(args) {

  var response = {
    "version": "1.0",
    "response" :{
      "shouldEndSession": true,
      "outputSpeech": {
        "type": "PlainText",
        "text": "Your random cat is " + randomName()
        }
      }
  }

  return response;

}

exports.main = main;
All I did was update my action to include the actual random bits, and then pushed it up to Bluemix. Then I ran my test again:
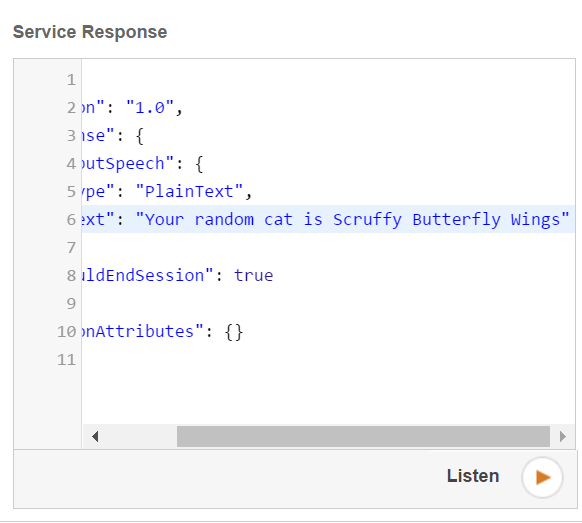
And here it is running on my device (with one of the best cat names ever):
Woot - another @openwhisk Alexa skill - took like five minutes. Dumb demo but I've LOLed a few times already. pic.twitter.com/FRbPj5k5OX
— Raymond Camden (@raymondcamden) March 9, 2017
Ok, let's ramp it up!
Version Two
In version two, I'm going to add a simple modification. I want to support creating a random cat name that begins with X. So instead of just returning a random cat name, it would be something I defined plus the random part.
I began by updating my interaction model, first with a new intent:
{
  "intents": [
    {
      "intent": "randomName"
    },
    {
      "intent":"nameWithPrefix",
      "slots":[
        {"name":"prefix", "type":"PREFIX"}
      ]
    }
  ]
}
The new intent is nameWithPrefix. Make note of the slot. The type, PREFIX, was created by me clicking on Add Slot Type. I had to provide some values, but to be clear, these were sample values. I provided two of them, and the UI nicely displays them for me:

I then added a new utterance for it:
nameWithPrefix give my cat a name that starts with {prefix}
I could have (and probably should have) defined a few more alternatives, but you get the point. And that was it on the Alexa side. In my code, I had to update it to recognize what intent was passed. Alexa sends this as arguments. Note, I trimmed out the parts of the function that weren't modified.
function main(args) {
	let intent = args.request.intent;
	console.log(args.request.intent);
	let text = 'Your random cat is ';

	if(intent.name === 'randomName') {
		text += randomName();
	} else if(intent.name === 'nameWithPrefix') {
		let prefix = args.request.intent.slots.prefix.value;
		text += prefix +' '+ randomName();
	}

	var response = {
	"version": "1.0",
	"response" :{
		"shouldEndSession": true,
		"outputSpeech": {
		"type": "PlainText",
		"text": text
		}
		}
	}

	return response;

}
Not too difficult I think. I check the intent, and if it was nameWithPrefix, I also have access to the word I specified. Once again I saved and pushed up to Bluemix, and then ran a quick test.
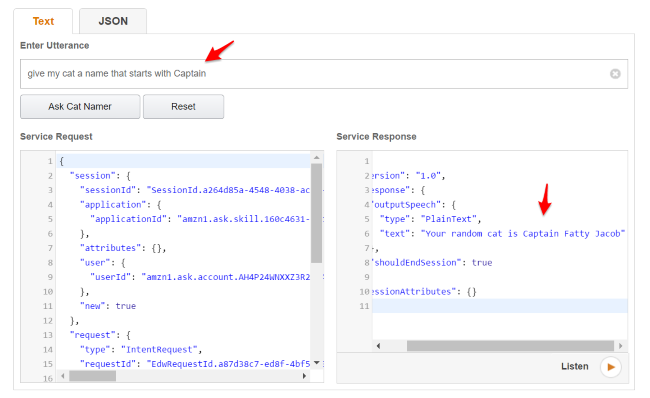
And that's it! Of course, there's a few more things to note...
Wrapping Up
Before I start sharing some important links, it is important to note that the skill I built is still unreleased. Actually releasing your skill involves a bit more work. Here is where things get a bit... wonky.
For your skill to be considered production ready, you must do the following. I'm quoting from a blog post from my former coworker, Jordan Kasper (and again, I'll be linking to a bunch of stuff at the bottom):
- Check the SignatureCertChainUrl header for validity.
- Retrieve the certificate file from the SignatureCertChainUrl header URL.
- Check the certificate file for validity (PEM-encoded X.509).
- Extract the public key from certificate file.
- Decode the encrypted Signature header (it's base64 encoded).
- Use the public key to decrypt the signature and retrieve a hash.
- Compare the hash in the signature to a SHA-1 hash of entire raw request body.
- Check the timestamp of request and reject it if older than 150 seconds.
The idea being to ensure your skill is really being called by Alexa and not some radom person. I get that. But... I got to say. This seems like NASA-level complexity. The good news is that someone has already built a Node library for this (see Jordan's post). I plan on using that for my follow tomorrow (or next week) as I update the action for release. As always, I'll share this wth my readers!
Alright, so now, the links!
- Alexa - main developer home page.
- Alexa Project Name Generator on OpenWhisk by Lorna Jane, a coworker of mine. It helped me with the response schema to my action. And by help I mean I just copied and pasted. ;)
- Building An Amazon Alexa Skill with Node.js - this is the post I mentioned by Jordan. He demonstrates that simple npm module I plan on using with my OpenWhisk action. (Hopefully!)