A few days ago I blogged about building a public API for a Cloudinary folder. I mentioned then that the impetus for that post was another post I had planned. Today I'm finally getting around to writing it. As folks know, I've been quite smitten with Alpine.js lately, and I thought it would be interesting to share a demo of using Cloudinary's Image transformation services in an Alpine app. While the implementation was pretty trivial, here's what I came up with.
First off, my Alpine application is going to display images from a specific folder of assets stored at Cloudinary. For that, I built the endpoint described in my last post: https://eoghaym28jbb0zf.m.pipedream.net/.
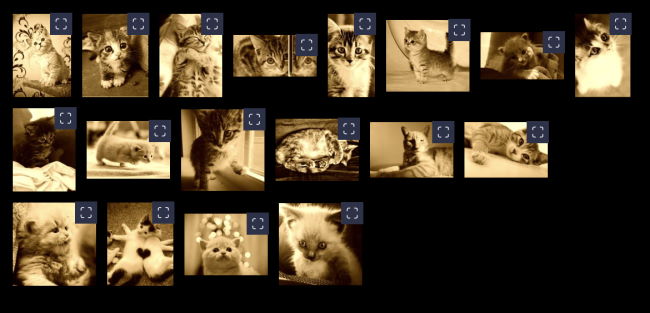
For each image in that folder, I want to display a thumbnail and then a "web-sized" version (basically something nicely sized but not huge). To display these images, I'm going to use a library I've used before, Parvus. Parvus is a lightbox library where you can view an image in a 100% full overlay above the rest of the page. It's fairly lightweight and simple and was easy to use last time, so I figured I'd fire it up again. Here's how the application renders:

Note the use of sepia. I used sepia because that's what real designers do. I'm kidding. Mostly. Seriously though, please don't take my horrible design skills as indicative of what you can build with Cloudinary and Alpine. I'm where good design goes to die.
Clicking on an individual image opens it up:

You can see that Parvus adds navigation, a counter (X of Y), and a "close" button. Let's look at the code.
The HTML, ignoring header and footer stuff, is pretty minimal:
<div x-data="app" id="results">
    <template x-for="photo in photos">
    <div>
    <a :href="webversion(photo.url)" class="lightbox" data-group="cloudinaryImageResults">
    <img :src="thumbnail(photo.url)">
    </a>
    </div>
    </template>
</div>
I'm looping over photos, and for each, I link to a webversion function called on the URL and display a thumbnail function version of the URL. In this case, URL is the original version of the asset, but as I said, I want a small (and sepia, don't forget the sepia, all professional designers know it) thumbnail and a 'web' version of the image.
Here's the JavaScript:
const IMAGE_API = 'https://eoghaym28jbb0zf.m.pipedream.net/';

document.addEventListener('alpine:init', () => {

  Alpine.data('app', () => ({
        photos:[],
        async init() {
            let resp = await fetch(IMAGE_API);
            this.photos = (await resp.json()).pictures;
            Alpine.nextTick(() => {
                const prvs = new Parvus();
            })
        },
        thumbnail(u,width=150,height=150) {
            return u.replace('upload/', `upload/e_sepia/c_fit,w_${width},h_${height}/`);
        },
        webversion(u,width=650,height=650) {
            return u.replace('upload/', `upload/c_fit,w_${width},h_${height}/`);
        },
  }))

});
From the top, my Alpine application starts by fetching the list of images from my Pipedream API. Once I get the images, I just assign them to my photos variable. Parvus needs to work with items in the DOM, and Alpine has a nextTick function much like Vue which works perfectly for that.
My two image formatting functions are just using string replacements on the original URLs. I had considered using the Cloudinary SDK (and you can see a great forum post on how that's done here) but figured with this incredibly simple use case, one line of code was better than another library.
And that's it! I said this was simple, remember? I used Glitch for the demo again which means you can play and fork with the demo here: https://glitch.com/edit/#!/ancient-tall-mustard. If you only want to view the demo, check it out here: https://ancient-tall-mustard.glitch.me/
Photo by Ludemeula Fernandes on Unsplash
